Easy DIY Entertainment Center Projects
Ikhsan Rizki
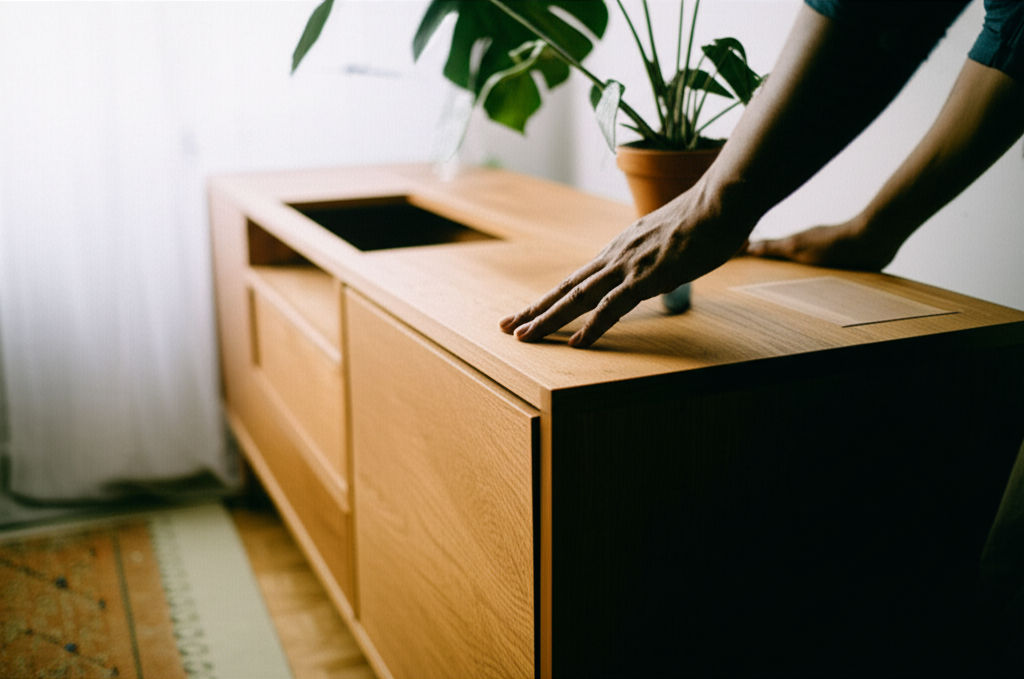
Photo: Tired of clutter & high costs? Build your own stylish, custom entertainment center! Our guide makes DIY easy & affordable.
Are you tired of a cluttered living room dominated by a tangle of wires and an uninspiring TV stand? Does the thought of buying a pre-made entertainment center make your wallet cringe? You're not alone! Many of us dream of a stylish, organized media space but are put off by high costs or the perceived complexity of custom solutions.
What if we told you that creating your dream entertainment hub could be an enjoyable, affordable, and surprisingly easy DIY project? This comprehensive guide will walk you through various Easy DIY Entertainment Center Projects, offering practical solutions and actionable steps to transform your entertainment area into a functional and aesthetically pleasing focal point. Get ready to unleash your inner craftsperson and build something truly unique!
Why Go DIY for Your Entertainment Center?
Choosing to build your own entertainment center offers a multitude of benefits beyond just saving money.
- Cost Savings: Pre-built entertainment centers, especially custom-designed ones, can range from thousands to tens of thousands of dollars. DIY projects, conversely, can often be completed for a fraction of that cost, sometimes even under $100 for basic setups.
- Customization to Your Space: The beauty of DIY is tailoring the unit to your exact dimensions and needs. Whether you have a massive flat-screen, a collection of gaming consoles, or a vast library of DVDs, you can design a unit that fits everything perfectly, utilizing every inch of available space.
- Personalized Style: Your home should reflect your personality. A DIY entertainment center allows you to choose materials, finishes, and designs that perfectly match your existing decor, creating a cohesive and inviting atmosphere.
- Sense of Accomplishment: There's immense satisfaction in stepping back and admiring a piece of furniture you built with your own hands. It's not just a storage unit; it's a testament to your creativity and effort.
- Clutter Control: A well-designed DIY media console can integrate various storage solutions, from open shelving to hidden compartments, keeping unsightly cables and electronics out of sight and your living area tidy.
Planning Your Easy DIY Entertainment Center Project
Before you grab your tools, a little planning goes a long way in ensuring a smooth and successful project.
Measure Your Space Accurately
This is arguably the most crucial step. Carefully measure the width, height, and depth of the area where your entertainment center will reside. Consider the size of your TV, speakers, and other media components to ensure they fit comfortably within your design. Remember, you can build it to whatever dimensions you want!
Assess Your Entertainment Gear
List all the items you need to house:
- TV size and mounting preference (on the stand or wall-mounted with the stand below).
- Gaming consoles (PlayStation, Xbox, Nintendo Switch).
- Soundbars, receivers, and speakers.
- Media players (Blu-ray, streaming devices).
- DVDs, CDs, video games, or books.
- Remotes and charging cables.
This inventory will help you determine the necessary shelving, cabinet space, and power access points.
Choose Your Materials Wisely
The material you choose will impact the look, durability, and cost of your homemade TV stand.
- Plywood or MDF: These are excellent, cost-effective, and easy-to-work-with options, perfect for painting or veneering. Birch plywood is a popular choice for a clean look.
- Reclaimed Wood: For a rustic or industrial vibe, reclaimed wood is an eco-friendly and budget-friendly choice.
- Solid Wood (Pine, Poplar): Offers a more traditional, sturdy feel, though it can be more expensive and require different woodworking techniques.
- Metal Pipes: Can be combined with wood shelves for a modern, industrial aesthetic.
- Pre-made Cabinets/Shelves: Items like IKEA Besta, Kallax, or even unfinished kitchen cabinets can serve as excellent foundations for hacks, significantly reducing cutting and assembly time.
Gather Your Tools
While complex built-ins might require advanced tools like table saws or pocket hole jigs, many easy DIY entertainment center projects can be completed with basic tools:
- Tape Measure
- Pencil
- Saw (hand saw, circular saw, or miter saw)
- Drill and Screwdriver Set
- Sandpaper or Orbital Sander
- Wood Glue
- Clamps
- Safety Glasses and Hearing Protection
Easy DIY Entertainment Center Project Ideas
Ready to get building? Here are some popular and achievable project ideas, ranging from super simple to slightly more involved.
1. Simple Crate or Shelf Unit
One of the most straightforward budget entertainment unit ideas involves using wooden crates or pre-made shelving units.
- Concept: Stack and arrange sturdy wooden crates or cube shelves (like those from IKEA) to form your desired configuration.
- How-to:
- Purchase unfinished wooden crates or modular cube shelves.
- Arrange them to fit your TV and components.
- Secure them together using wood glue and screws for stability.
- Sand and paint or stain them to match your decor. This provides open storage and a clean look.
- Tip: Add small castor wheels to the bottom crates for easy mobility, or secure them to the wall for safety, especially if you have children or pets.
2. IKEA Hack Entertainment Centers
IKEA furniture is a DIYer's dream, offering affordable and versatile bases for custom projects. IKEA Besta and Kallax units are particularly popular for IKEA hack TV units.
- Concept: Transform standard IKEA pieces into custom-looking entertainment centers by adding custom tops, doors, legs, or decorative finishes.
- How-to (Besta/Kallax Hack):
- Assemble the IKEA Besta or Kallax frames according to instructions. These often form a sturdy base for your media console.
- Add custom doors and drawer fronts from third-party suppliers or DIY them from plywood for a unique look.
- Install new, stylish legs or a custom base to elevate the unit.
- Consider adding a custom countertop made from plywood, MDF, or even a marble film-covered board for a luxurious touch.
- For a built-in look, you can add trim and molding around the IKEA units to make them appear seamlessly integrated with your wall. Some even use IKEA kitchen cabinets as a base for a floating TV sideboard.
- Tip: Search for "IKEA Besta hack" or "Kallax entertainment center" online for endless inspiration and detailed tutorials. Many find these easier than building from scratch.
3. Elegant Floating Shelves
For a minimalist and modern aesthetic, floating shelves around your TV can create a sophisticated custom media storage solution without taking up floor space.
- Concept: Install sturdy floating shelves on the wall to hold media components, decorations, and even books, with the TV often wall-mounted above or between them.
- How-to:
- Plan the layout carefully, considering the TV's position and the size of your components.
- Choose strong shelving material (e.g., thick plywood or solid wood) and appropriate wall anchors/brackets.
- Install the shelves securely into wall studs for maximum support.
- Integrate cable management solutions behind the shelves or wall to keep wires out of sight.
- Tip: Use a laser level to ensure perfect alignment of your shelves for a professional finish.
4. Upcycled Furniture Entertainment Center
Give old furniture new life by repurposing it into a functional and charming entertainment center. Old dressers, bookcases, or even large armoires can be transformed.
- Concept: Take an existing piece of furniture and modify it to suit your media needs.
- How-to (Dresser/Bookcase Conversion):
- Dressers: Remove drawers or modify them to create open shelving for components. Drill holes in the back for cable access. Paint or refinish the dresser for a fresh look.
- Bookcases: Add a sturdy top surface for your TV. Reconfigure shelves to accommodate electronics. You might even add doors to some sections for hidden storage.
- Old TV Cabinets/Armoires: These are often perfect candidates! Remove the internal TV mount, add new shelves, paint, or wallpaper the back for a fresh look. They can become liquor cabinets, craft stations, or even play kitchens!
- Tip: Look for sturdy, solid wood pieces at thrift stores, garage sales, or online marketplaces. A little sanding and paint can work wonders!
Finishing Touches & Cable Management
A truly professional-looking DIY entertainment center isn't complete without attention to detail, especially when it comes to managing those pesky cables.
Painting, Staining, and Decorating
Once your structure is built, the finishing touches bring it to life:
- Sanding: Smooth all surfaces with sandpaper, starting with a coarser grit and moving to finer grits for a silky finish.
- Priming & Painting: If painting, apply a good primer first, especially on plywood or MDF, then several thin coats of your chosen paint color.
- Staining: If using solid wood or birch plywood, apply wood stain and then a protective topcoat (polyurethane, lacquer) for durability.
- Hardware: Add stylish knobs, pulls, or hinges to doors and drawers.
- Lighting: Integrate LED strip lights behind shelves or around the TV for ambient lighting and a modern touch.
Mastering Cable Management Solutions
Nothing ruins the aesthetic of a beautiful entertainment center faster than a messy tangle of wires. Effective cable management is key.
- Bundle and Secure: Use Velcro straps or zip ties to group cables together. This makes them easier to manage and less visually chaotic.
- Cable Clips and Sleeves: Attach adhesive cable clips to the back of your unit or along furniture legs to guide and secure bundles. Cable sleeves can encase multiple wires for a cleaner look.
- Drill Access Holes: Plan and drill holes in the back panels or shelves of your unit to allow cables to pass through discreetly. Add grommets for a finished look.
- Hidden Compartments: Design your unit with hidden drawers or cabinets specifically for surge protectors, routers, and other devices, keeping them out of sight.
- In-Wall Cable Management Kits: For a truly seamless look, consider an in-wall cable management system, especially if your TV is wall-mounted. These kits allow you to run power and AV cables inside the wall.
- Strategic Placement: Position your entertainment center or other furniture to conceal wires.
Conclusion
Building your own easy DIY entertainment center project is a rewarding endeavor that offers unparalleled customization, significant cost savings, and the satisfaction of creating something truly your own. From simple stacked crates to sophisticated IKEA hacks and repurposed furniture, there's a project suited for every skill level and budget. By taking the time to plan, choose your materials, and pay attention to those crucial finishing and cable management details, you can transform your living space into an organized, stylish, and highly functional entertainment hub.
Ready to clear the clutter and elevate your home entertainment experience? Pick your project, gather your tools, and start building today! We'd love to see your creations – share your custom media storage triumphs in the comments below!
Frequently Asked Questions
Q1: How much does a DIY entertainment center typically cost?
The cost of a DIY entertainment center can vary significantly based on materials, size, and complexity. Simple projects using materials like plywood, 2x4s, or repurposed furniture can cost as little as $50-$150. More elaborate custom built-ins using multiple sheets of plywood and additional hardware might range from $800 to $1,500. In contrast, professionally installed built-in entertainment centers can cost between $5,000 and $15,000.
Q2: What are the most essential tools for a beginner DIY entertainment center project?
For basic easy DIY entertainment center projects, you'll need a tape measure, a pencil, a saw (a hand saw, circular saw, or miter saw will suffice), a drill with various bits, a screwdriver set, and sandpaper. Wood glue and clamps are also highly recommended for strong joints. For more advanced projects, tools like a pocket hole jig, brad nailer, or orbital sander can be very helpful.
Q3: How can I effectively hide all the cables and wires?
Effective cable management is crucial for a clean look. You can use simple solutions like Velcro straps, zip ties, and adhesive cable clips to bundle and secure wires behind the unit. Cord covers can be painted to match your walls or furniture. For a truly seamless finish, consider routing cables through drilled holes in the back of your unit or using an in-wall cable management kit to conceal wires inside the wall.
Q4: Can I really build an entertainment center if I have no woodworking experience?
Absolutely! Many DIY media console plans are designed with beginners in mind, focusing on straightforward cuts and assembly methods. Projects using pre-made components like IKEA hacks or repurposed furniture are excellent starting points as they require less intense woodworking. Look for plans labeled "easy" or "beginner-friendly," and remember that patience and attention to detail are your best tools.
Business
View All
November 25, 2025
Pros and Cons of Leasing Business SpaceConsidering leasing business space? Discover the advantages & disadvantages of renting commercial property to align with your business goals.
Ikhsan Rizki

September 23, 2025
Business Casual Dresses You’ll LoveUnlock effortless office style! Discover how business casual dresses can be your secret weapon for comfort, style, and professionalism at work.
Ikhsan Rizki

September 8, 2025
Use NE Business Search the Right WayUnlock Nebraska's official business data! Master the free NE Business Search tool for name availability, due diligence, and competitor analysis.
Ikhsan Rizki

September 18, 2025
How to Use the BECU Business LoginMaster BECU Business Login for seamless financial management. Learn how to access powerful online banking tools & features for your company.
Ikhsan Rizki

November 19, 2025
District of Columbia Business Search GuideMaster DC business searches! Our guide shows how to use CorpOnline for due diligence, name checks, and consumer protection in Washington D.C.
Ikhsan Rizki

October 24, 2025
Philippine Airlines Business ClassIs Philippine Airlines Business Class worth it? Our comprehensive guide details PAL's premium experience, from priority services to lounge access, helping you d...
Ikhsan Rizki
Economy
View All
Uncover the Middle Colonies' economic secrets! Learn how their rich soil, diverse crops, and bustling trade made them colonial America's "Breadbasket."
Ikhsan Rizki

Economy lube: Is it a smart save or a hidden cost? Learn the truth about budget car maintenance to protect your wallet and your ride.
Ikhsan Rizki

Discover the critical flaws of command economies. Learn how central planning breeds inefficiency, stifles innovation, and limits individual freedom.
Ikhsan Rizki

How did Trump's tariffs reshape the US economy? Explore their real impact on prices, jobs, industries, and global trade.
Ikhsan Rizki

Demystify Economy 2.0! Explore the digital transformation, AI, and interconnectedness driving the future of our global economy.
Ikhsan Rizki

Considering a budget stay in Memphis? Discover if Economy Hotel Memphis is worth it! This guide explores its amenities, location, and what to expect.
Ikhsan Rizki
Education
View All
Considering a career as an SLP? This guide breaks down the Speech-Language Pathologist education path, from degrees to certification, for a rewarding future.
Read More
Unlock real-world financial expertise with Bloomberg for Education. Gain practical skills using the Bloomberg Terminal & prepare for a successful career.
Read More
Dream of becoming a child doctor? This roadmap outlines every step of the pediatrician education requirements, from undergrad to board certification.
Read More
Illinois educators, find your ideal financial partner! Discover how IECU offers tailored services, better rates, and true support for your unique needs.
Read More
OTs: Elevate your practice! Discover how continuing education boosts skills, advances careers, and enhances patient outcomes. More than just CEUs.
Read More
Empower your breastfeeding journey! Explore top lactation education resources, including online courses & books, for confident and successful feeding.
Read More


Health
View All
October 15, 2025
Is Crest Pro Health Worth ItIs Crest Pro-Health worth it? Explore its 8 advanced benefits for comprehensive oral care & decide if it's right for your smile.
Ikhsan Rizki

August 31, 2025
Community Health Worker Job TipsAspiring Community Health Worker? Discover essential tips to land your dream CHW job, understand the role, and make a real difference in communities.
Ikhsan Rizki

November 14, 2025
Home Health Jobs You’ll LoveDiscover rewarding home health jobs! Enjoy flexibility, personalized care, and great job security in a booming field. Make a real difference.
Ikhsan Rizki

September 10, 2025
UMB Health Savings Account GuideUnlock your health & wealth with a UMB HSA! Our guide covers basics, advanced strategies, and tax benefits to manage costs & save for the future.
Ikhsan Rizki

November 7, 2025
Prince Charles and Health InsightsDiscover King Charles III's unique health philosophy: integrated care, natural remedies, and organic living. Learn from his holistic approach.
Ikhsan Rizki

November 5, 2025
One Brooklyn Health System UpdateOne Brooklyn Health System updates: Learn how OBHS is enhancing care, facilities, and technology to improve health and wellness for Brooklyn residents.
Ikhsan Rizki
Popular Articles
View All
1
2
3
4
5
6
7
8
9
10
Lifestyle
View All
October 17, 2025
Fast Ways to Get Sims Lifestyle Points
Get free Sims FreePlay Lifestyle Points fast! Master the cooking hobby hack and other quick methods to boost your game and live your best virtual life.

August 31, 2025
Kasi Lifestyle 3D Breakdown
Discover the vibrant Kasi Lifestyle! Unpack South Africa's unique township culture, community spirit, and economic ingenuity in this 3D breakdown.

October 21, 2025
Why Choose Lifestyle Barber Studio
Elevate your grooming at Lifestyle Barber Studio. Experience personalized service, expert barbers, and a unique, relaxing atmosphere for your perfect look.

November 17, 2025
Top Lifestyles Rich and Famous Episodes
Relive the "champagne wishes & caviar dreams"! Explore the top episodes of Lifestyles of the Rich and Famous that defined an era of luxury.

October 6, 2025
Avalon Nail Salon Lifestyle Guide
Explore Avalon Nail Salon services, what to look for in a great salon, health benefits of nail care, and essential home tips.

September 10, 2025
Must Haves From the Miniverse Lifestyle Home
Uncover Miniverse Lifestyle Home's must-have miniatures. Transform your space with unique, charming, and collectible tiny decor.

August 7, 2025
Rich Homie Quan lifestyle lyrics
Decode Rich Homie Quan's "lifestyle" lyrics. Unpack themes of rags-to-riches, wealth, loyalty, and street life in his impactful music.

August 13, 2025
Exploring Modern Vampire Lifestyle
Beyond fiction: Explore the modern vampire lifestyle as a real subculture. Discover its identity, aesthetic, and nocturnal allure, dispelling myths.
Sports


Travel
View All
October 21, 2025
How Far a Bullet Can Travel
Demystify bullet travel! Learn the real distances, key factors, and science behind how far a bullet can truly go. Essential for safety & knowledge.

September 17, 2025
Joes Travel Plaza Stop and Eat
Tired of bad road stops on I-5? Joes Travel Plaza in CA is your ultimate oasis! Enjoy diverse dining, essential amenities & comfort for weary travelers.

October 18, 2025
Travel Consent Form for Minors PDF
Traveling with kids? Learn why a Travel Consent Form for Minors PDF is crucial for safe, hassle-free journeys when children travel without both parents.

August 7, 2025
How to Choose the Best Travel Car Seat
Ditch bulky car seats! Find the best lightweight, portable travel car seat for safe, stress-free family adventures. Your ultimate guide.

October 24, 2025
Fairburn Family Travel Center Road Trip Stop
Fairburn Family Travel Center: Your ultimate road trip oasis! Refuel, refresh, and recharge with unmatched comfort & amenities for the whole family.

October 27, 2025
Luxury Travel Magazine for Dreamers
Ignite your wanderlust with a luxury travel magazine. Discover curated experiences, hidden gems & sophisticated escapes for dreamers.